
Encountering an error while scanning your TravelyData eSIM QR code can be a frustrating start to your journey, but these issues are usually easy to resolve. Whether your camera is failing to recognize the code or you are receiving an “Invalid Code” notification, understanding the underlying causes and alternative installation methods will help you get connected quickly and efficiently.
Why QR Codes May Fail
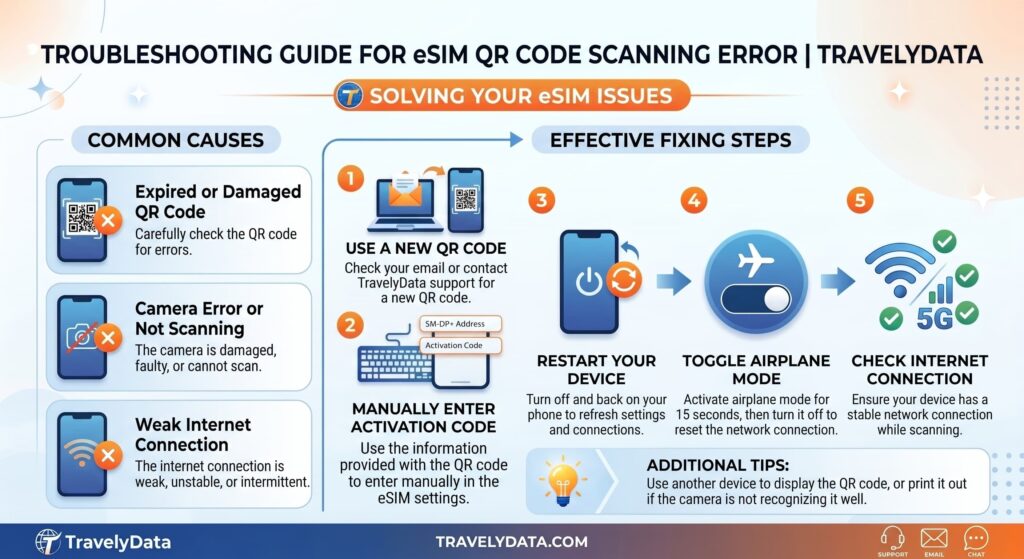
The most common reason for a scanning error is that eSIM QR codes are strictly single-use. Once a QR code has been scanned and the eSIM profile is downloaded to a device, the code is permanently deactivated. If you have already attempted to install the eSIM on another device, or if you deleted the profile and are trying to reinstall it, the QR code will no longer function. Additionally, ensure you have a stable internet connection (Wi-Fi or mobile data) during the scanning process, as your device must communicate with the activation server to validate the code.
Switching to Manual Installation
If your device camera cannot read the QR code due to lighting, screen glare, or hardware limitations, you should use the Manual Installation method. This is a fail-safe way to activate your eSIM without needing to scan anything. All the necessary details for this process were sent to you in your TravelyData confirmation email.
Required Manual Details
To complete a manual setup, you will need to locate two specific pieces of information in your activation email:
- SM-DP+ Address: A server address that identifies the eSIM provider.
- Activation Code: A unique alphanumeric string assigned to your specific eSIM profile.
How to Install Manually on Your Device
- Open your device Settings and navigate to Cellular or Mobile Data.
- Tap Add eSIM or Add Data Plan.
- Select Use QR Code, then look for the option at the bottom of the screen labeled Enter Details Manually.
- Carefully copy and paste the SM-DP+ Address and Activation Code from your email into the corresponding fields.
- Follow the remaining on-screen prompts to label your new plan and complete the activation.
By using the manual entry method, you bypass potential optical errors and establish a direct link to our servers, ensuring your data plan is ready for use immediately.